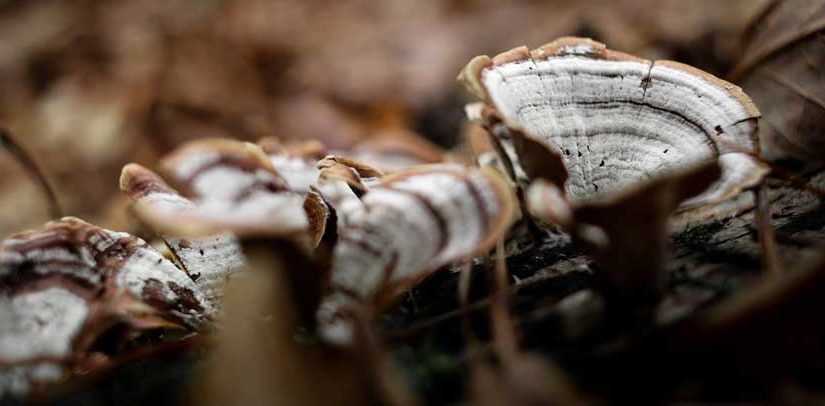
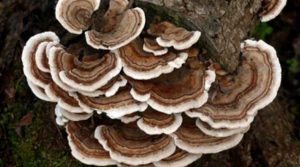
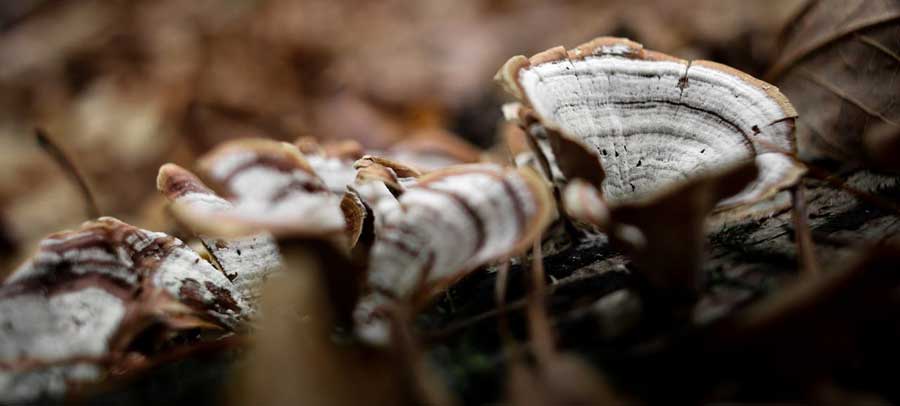
Turkey tail mushrooms are one of the world’s most common and easy-to-grow mushrooms. Termites versicolor get their name from their ability to be different colors, such as brown, gray, blue, and purple. They have a distinctive shape resembling a wild turkey’s tail feathers, hence the name.
Turkey tail mushrooms are not only beautiful but also beneficial. They have substances that help the immune system, fight inflammation, and prevent cancer. People commonly use this mushroom in traditional medicine, particularly in Asia, as a tonic for long life and energy.
If you want to grow your own turkey tail mushrooms at home, you will be happy to know that it is relatively easy. Turkey tail mushrooms are easy to grow on various types of wood, including hardwood logs, cardboard, and paper. They also do not require much maintenance, as they can tolerate various temperatures and humidity levels.
In this guide, we will show you step-by-step instructions on how to grow turkey tail mushrooms using plug spawn and sawdust spawn. We will also give you some tips on how to harvest and use your turkey tail mushrooms. Let’s get started!
What You Will Need for Growing Your Turkey Tail Mushrooms?
Before you start, you will need to gather some materials and tools. Here is a list of what you will need for each method:
Plug Spawn Method
- Turkey tail mushroom plug spawn. Plug spawn is a small wooden dowel that is inoculated with mushroom mycelium, the root-like network of fungal cells. You can buy plug spawn online or from a local mushroom supplier. To create plug spawn, drill holes in wooden dowels. Then, place turkey tail mushroom tissue or stem ends inside the holes.
- Hardwood logs. You can use any hardwood logs, such as oak, maple, birch, or beech, as long as they are fresh and healthy. Avoid using softwood logs, such as pine, spruce, or cedar, as they contain resin that inhibits mushroom growth. You can cut your own logs from fallen trees or branches or buy them from a firewood supplier. The ideal size of the logs is about 3 to 6 inches in diameter and 2 to 4 feet in length.
- Drill and drill bits. You will need a drill and drill bits that match the size of your plug spawn. For example, if your plug spawn is 5/16 inches in diameter, you will need a 5/16-inch drill bit. You will also need a tape measure and a marker to mark the holes in the logs.
- Hammer. You will need a hammer to tap the plug spawn into the holes on the logs.
- Wax and wax melter. You will need some wax, such as beeswax or cheese wax, and a wax melter, such as a double boiler or a crockpot, to seal the holes on the logs. This will prevent moisture loss and contamination by other fungi or insects.
- Brush. You will need a brush, such as a paintbrush or a pastry brush, to apply the wax to the holes.
- Labels. You will need some labels, such as masking tape or sticky notes, and a pen or a marker, to label your logs with the date and the type of mushroom.
- A shady spot. You will need a shady spot, such as under a tree, a porch, or a shed, to place your logs. You will also need some supports, such as bricks, stones, or wooden blocks, to elevate your logs off the ground. This will improve air circulation and prevent rotting.
Sawdust Spawn Method
- Turkey tail mushroom sawdust spawn. Sawdust spawn is a bag of hardwood sawdust that is inoculated with mushroom mycelium. You can buy sawdust spawn online or from a local mushroom supplier. Alternatively, you can make your own sawdust spawn by mixing hardwood sawdust with turkey tail mushroom tissue or stem butts and sterilizing it in a pressure cooker or a steam bath.
- Cardboard or paper. You can use any cardboard or paper, such as cardboard boxes, egg cartons, newspapers, or magazines, as long as they are clean and free of ink or glue. You will need to cut or tear them into small pieces, about 2 to 3 inches in size.
- A large container. You will need a large container, such as a bucket, a tub, or a trash can, to soak the cardboard or paper in water. You will also need some water and a weight, such as a brick, a stone, or a lid, to submerge the cardboard or paper.
- A large tray or baking dish: You will need a large tray or a baking dish, such as a roasting pan or a lasagna dish, to layer the cardboard or paper and the sawdust spawn. You will also need some plastic wrap or a lid to cover the tray or the dish.
- A warm and dark place. You will need a warm and dark place, such as a closet, a cabinet, or a basement, to incubate your tray or dish. You will also need a thermometer and a hygrometer to monitor the temperature and the humidity. The ideal temperature is about 70 to 80°F, and the ideal humidity is about 80 to 90%.
- A bright and airy place. You will need a bright and airy place, such as a windowsill, a balcony, or a greenhouse, to fruit your tray or dish. You will also need a spray bottle to mist your tray or dish daily.
How to Grow Turkey Tail Mushrooms Using Plug Spawn Method?
The plug spawn method is a traditional and reliable way to grow turkey tail mushrooms on hardwood logs. Here are the steps to follow:
- Drill holes in the logs. Using a drill and a drill bit, drill holes in the logs, about 2 to 4 inches apart, in a diamond pattern.
-
- The holes should be about 1 to 2 inches deep, depending on the length of your plug spawn.
- Mark the holes with a marker or a tape measure to ensure even spacing.
-
- Insert the plug spawn into the holes. Using a hammer, gently tap the plug spawn into the holes until they are flush with the log’s surface. Ensure the plug spawns are firmly in place and do not fall out.
- Seal the holes with wax. Melt some wax over low heat using a wax melter until it is liquid. Using a brush, apply the wax over the holes, covering the plug spawn completely. This will seal the holes and prevent moisture loss and contamination.
- Label the logs. Using a label and a pen or a marker, write the date and the type of mushroom on the logs. This will help you keep track of your logs and know when to expect mushrooms.
- Place the logs in a shady spot. Find a shady spot, such as under a tree, a porch, or a shed, to place your logs.
-
- Use some supports, such as bricks, stones, or wooden blocks, to elevate your logs about 6 to 12 inches off the ground. This will improve air circulation and prevent rotting.
- Make sure that direct sunlight, strong winds, or heavy rain do not expose the logs.
-
- Wait for the mycelium to colonize the logs. The mycelium is the white, fuzzy, or stringy substance that grows on the plug spawn and spreads throughout the log. This is the living part of the mushroom that will produce the fruit bodies or the mushrooms that we eat.
-
- The colonization process can take 6 to 12 months, depending on the type and size of the log, the temperature, and the humidity.
- You can check the progress of the mycelium by looking at the ends of the logs, where you may see some white patches or strands.
- You can also gently scrape off some wax from the holes and peek inside.
- Do not disturb the mycelium too much, as this may slow down or damage the colonization.
-
- Soak the logs to induce fruiting. When the mycelium fully colonizes the logs, you can soak them in water to induce fruiting. This will mimic the natural conditions that trigger mushroom growth, such as rainfall and temperature change.
-
- You can use an enormous container, such as a bathtub, a barrel, or a pond, to soak the logs. Fill the container with water and submerge the logs for 24 hours.
- You can also add some salt, sugar, or molasses to the water to boost the fruiting.
- After soaking, drain the logs and place them back in the shady spot.
-
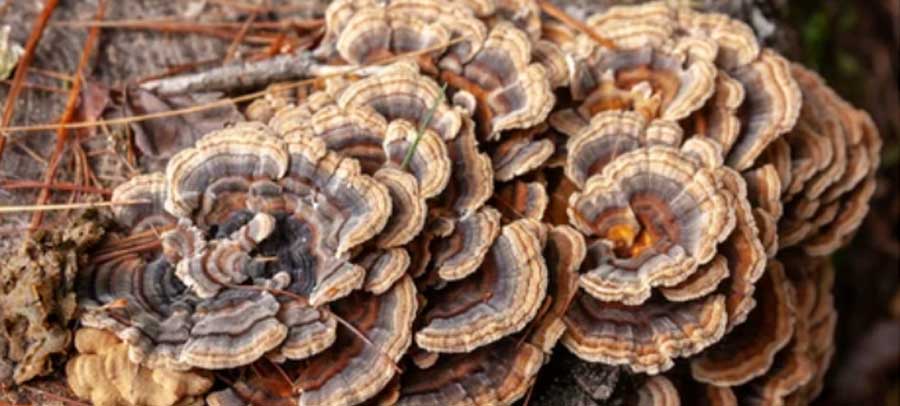
- Harvest your turkey tail mushrooms. Within a few weeks of soaking, you should see some small, colorful, and fan-shaped mushrooms growing on the logs. These are your turkey tail mushrooms, ready to be harvested.
-
- You can harvest them by gently twisting or cutting them off the logs.
- You can also use a knife or scissors to trim off any excess wood or bark.
-
Harvest your turkey tail mushrooms when they are young and fresh before they become tough and leathery.
-
-
- You can harvest them several times a year as long as the logs are healthy and moist.
- You can store your fresh turkey tail mushrooms in the refrigerator for up to a week or dry them for longer storage.
-
How to Grow Turkey Tail Mushrooms Using Sawdust Spawn Method?
The sawdust spawn method is a modern and convenient way to grow turkey tail mushrooms on cardboard or paper. Here are the steps to follow:
- Soak the cardboard or paper in water. Fill a large container with water and add some cardboard or paper pieces.
-
-
- Use a weight, such as a brick, a stone, or a lid, to submerge the cardboard or paper completely.
- Let them soak for 24 hours until they are soft and wet.
-
- Drain and squeeze the cardboard or paper. After soaking, drain the water and squeeze the cardboard or paper pieces to remove the excess water. They should be moist but not dripping wet.
- Layer the cardboard or paper, and the sawdust spawn. Start by placing cardboard or paper on the bottom of a tray or dish.
Then, spread some sawdust spawn over the cardboard or paper evenly. Repeat with another layer of cardboard or paper, and sawdust spawn until you fill the tray or dish. The final layer should be cardboard or paper, with no sawdust spawn on top.
- Cover the tray or dish with plastic wrap or a lid. Cover the tray or dish tightly Using plastic wrap or a lid, leaving some small holes or gaps for air exchange. This will create a humid and dark environment for the mycelium to grow.
- Place the tray or dish in a warm and dark place. Find a warm and dark place to place your tray or dish, such as a closet, a cabinet, or a basement.
-
-
- Use a thermometer and a hygrometer to monitor the temperature and the humidity. The ideal temperature is about 70 to 80°F, and the ideal humidity is about 80 to 90%.
- Keep the tray or dish in this place for 2 to 4 weeks until the mycelium has fully colonized the cardboard or paper.
- You can check the progress of the mycelium by lifting the plastic wrap or the lid and looking at the tray or dish.
- You should see some white, fuzzy, or stringy growth on the cardboard or paper covering the entire tray or dish.
- Do not disturb the mycelium too much, which may slow down or damage the colonization.
-
- Move the tray or dish to a bright and airy place. When the mycelium has fully colonized the cardboard or paper. Then you can move the tray or dish to a bright and airy place, such as a windowsill, a balcony, or a greenhouse.
-
-
- Remove the plastic wrap or the lid and expose the tray or dish to indirect sunlight and fresh air. This will trigger the fruiting of the mushrooms.
- Use a spray bottle to mist the tray or dish daily, keeping it moist but not soggy.
-
- Harvest your turkey tail mushrooms. Within a few weeks of moving the tray or dish to a bright, airy place, you should see some small, colorful, and fan-shaped mushrooms growing on cardboard or paper. These are your turkey tail mushrooms, ready to be harvested.
-
-
- You can harvest them by gently pulling or cutting them off the cardboard or paper.
- You can also use a knife or scissors to trim off any excess cardboard or paper.
-
Harvest your turkey tail mushrooms when they are young and fresh before they become tough and leathery.
-
-
- You can harvest them several times as long as the tray or dish is healthy and moist.
- You can store your fresh turkey tail mushrooms in the refrigerator for up to a week or dry them for longer storage.
-
Conclusion
Turkey tail mushrooms are one of the world’s most common and easy-to-grow mushrooms. They are also one of the most beneficial, as they have many health properties and uses.
You can grow your own turkey tail mushrooms at home using two different methods: plug spawn and sawdust spawn. Both methods are simple and effective and require only some basic materials and tools.
You can enjoy your homegrown turkey tail mushrooms in various ways, such as tea, soup, tincture, or powder. Happy mushroom growing!