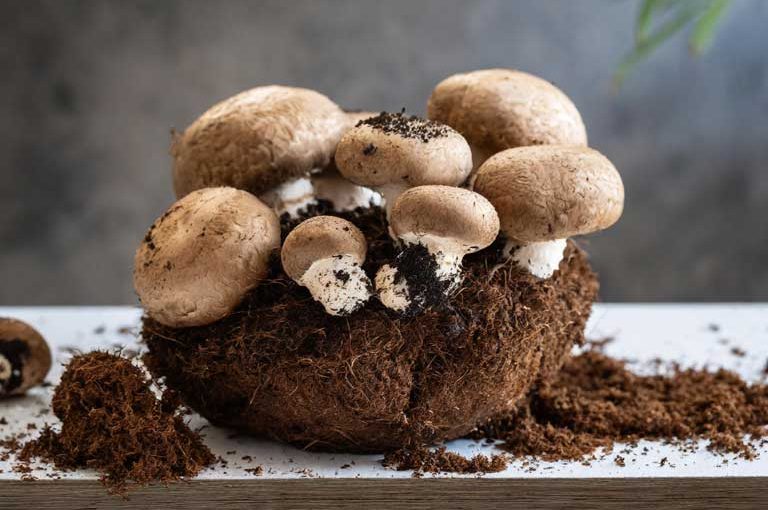
Have you ever wondered how to grow your mushrooms at home? You can grow mushrooms in various ways, and they are a delicious and nutritious food. One big problem for mushroom growers is finding a good substance to grow their mushrooms on.
A substrate is a material that provides nutrients and an environment for mycelium. Mycelium is a root-like network of fungal cells. These cells are responsible for producing mushrooms. Different mushrooms like different things to grow on, and some things are harder or cost more to get.
What if I said there’s a cheap, eco-friendly substrate that’s easy to find and can grow various types of mushrooms? Sounds too good to be true, right? Well, it’s not. It’s Coco Coir.
Coco coir is a natural and organic growing medium derived from coconut husks. It has many benefits for mushroom cultivation and is one of the best substrates for beginners and intermediate growers. In this article, I’ll show you how to use coco coir as a mushroom substrate and why you should try it.
What is Coco Coir?
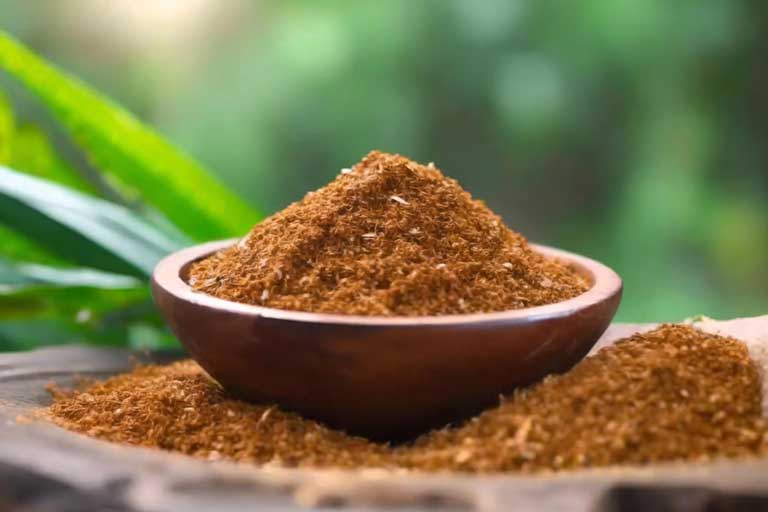
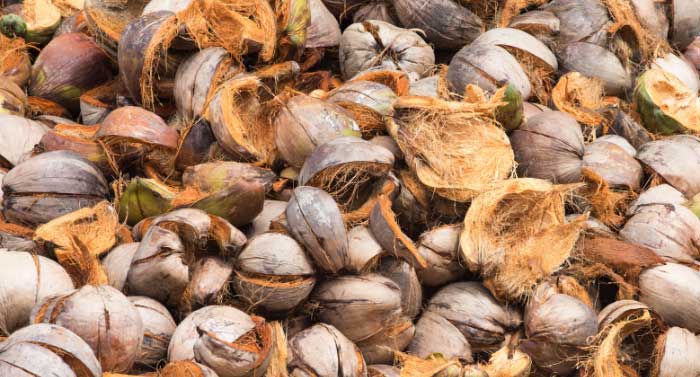
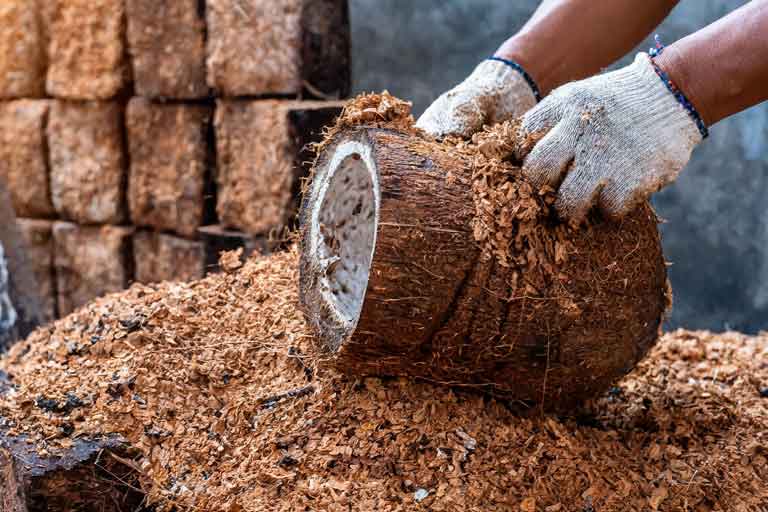
Coco coir, also known as coco peat, is a byproduct of the coconut industry. After extracting the long fibers from the coconut husks, it is the leftover material. Coco coir is usually sold in compressed blocks that need to be rehydrated before use.
Coco coir is eco-friendly and sustainable. It uses coconut waste and reduces the need for harmful peat extraction. Coco coir is also biodegradable and compostable, making it an excellent choice for organic gardening and farming.
Coco coir has a fibrous and spongy texture, making it an ideal growing medium for plants and mushrooms. It has excellent drainage, aeration, and water retention properties, which are essential for healthy mycelium growth. It also has a slightly acidic pH, which is similar to the acidity levels preferred by many mushroom species.
Pros and Cons of Coco Coir as a Mushroom Substrate
Coco coir has many advantages as a mushroom substrate, but it also has some drawbacks that you should be aware of. Here are some of the pros and cons of using coco coir for mushroom cultivation.
Pros
- Affordability: Coco coir is one of the most cost-effective substrates you can find. When water is added to coco coir, it can increase in size by 10 times. This results in a significant amount of material available at a low cost. You can reuse coco coir for many mushroom crops if it’s not contaminated or lacking nutrients.
- Ease of Use: Coco coir is easy to prepare and use as a mushroom substrate. All you need to do is soak the block in water for 30 minutes to an hour or until it has expanded fully. Then, you can break apart the coir and mix it with other materials, such as vermiculite, to create a well-balanced substrate. You don’t need to sterilize coco coir, as it is naturally resistant to harmful microorganisms. You only need to pasteurize it, which is a simpler and faster process than sterilization.
- Coco coir is good for growing many types of mushrooms, especially ones that don’t need a lot of nutrients. Some of the most popular mushrooms that grow well on coco coir are oyster mushrooms, lion’s mane, and shiitake. Mix coco coir with other materials like straw, wood chips, or coffee grounds to make personalized blends for your mushrooms.
- Environmentally Friendly: Coco coir is a renewable and eco-friendly resource that does not harm the environment. The waste product of coconut harvesting makes it, which people would otherwise discard or burn. It also reduces the need for peat extraction, which destroys natural habitats and releases greenhouse gases. Coco coir is also biodegradable and compostable, which means you can dispose of it safely after using it.
Cons
- Nutrient Content: Coco coir is not very rich in nutrients, so it may not support the growth of some mushroom varieties requiring more nourishment. For example, button mushrooms and portobello mushrooms may produce low yields on coco coir alone. You may need to supplement coco coir with additional nutrients, such as gypsum, manure, or worm castings, to boost its fertility and productivity.
- pH Level: Coco coir has a naturally acidic pH of around 6 to 6.5. This suits most mushroom species, but some may prefer a more neutral or alkaline pH. For example, oyster mushrooms and shiitake mushrooms may perform better on substrates with a pH of 7 or higher. You may need to adjust the pH of the coco coir by adding lime or other alkaline materials, depending on the mushroom requirements.
- Supplements: Coco coir may need extra nutrients and pH adjustments for growing mushrooms, depending on the type of mushroom. This may add some extra cost and effort to your mushroom cultivation process. Try different ratios and combinations of supplements to find the best mix for your mushrooms.
How to Prepare Coco Coir Substrate
Preparing coco coir substrate is a simple and straightforward process that anyone can do at home. Here are the steps you need to follow to make your own coco coir substrate for mushroom cultivation.
Step 1: Preparing the Coco Coir Substrate
The first step is to rehydrate the coco coir block and break it apart. You will need a large bucket or container, gloves, and enough water to cover the block. Follow these instructions:
- Place the coco coir block in the bucket or container and fill it with water. You can use tap water, rainwater, or distilled water if it is clean and free of chlorine or other chemicals.
- Let the block soak in the water for 30 minutes to an hour or until it fully expands. You may need to flip the block or poke it with a stick to ensure even hydration.
- Once the block fully expands, you should drain the excess water and squeeze the coir to remove any remaining moisture. The coir should be moist but not dripping wet.
- Break apart the coir with your hands or a fork, and fluff it up to create a loose and airy texture.
Step 2: Sterilizing the Substrate
The next step is sterilizing the coco-coir substrate to eliminate potential contaminants, such as harmful bacteria or fungi. You will need a large pot with a lid, a thermometer, and a strainer. Follow these instructions:
- Fill the pot with water and bring it to a boil. You can add some hydrogen peroxide (about 1 tablespoon per gallon of water) to increase the effectiveness of the sterilization.
- Place the coco coir substrate in the strainer and submerge it in the boiling water. Make sure the water fully covers the substrate and stir it occasionally to ensure even heat distribution.
- Keep the substrate in the boiling water for 15 to 20 minutes or until the temperature reaches 160°F to 180°F. Do not exceed this temperature range, as it may damage the substrate or kill the beneficial microorganisms.
- After the sterilization is complete, remove the substrate from the water and let it cool down. You can spread it on a clean surface or place it in a sterile container.
Related Post: How to Sterilize a Room for Growing Mushrooms: Easy Guide
Step 3: Mixing the Substrate
Mix coco coir with other materials to create a balanced substrate for your mushrooms. You will need vermiculite, gypsum, and a large mixing bowl or bucket. Follow these instructions:
- Measure the amount of coco coir substrate you have and calculate the amount of vermiculite and gypsum you need. The ideal ratio is 70% coco coir, 30% vermiculite, and 5% gypsum. For example, if you have 10 cups of Coco coir, you will need 4.3 cups of vermiculite and 0.7 cups of gypsum.
- Place the coco coir substrate, vermiculite, and gypsum in the mixing bowl or bucket and mix them thoroughly. You can use your hands or a spoon to ensure even distribution of the materials.
- Check the pH of the substrate using a pH meter or a pH test strip. The ideal pH range for most mushrooms is 6.5 to 7.5. If the pH is too low, you can add some lime or other alkaline materials to raise it. If the pH is too high, add some vinegar or other acidic materials to lower it.
- Your coco coir substrate is now ready to use. You can store it in a sealed container or bag until you are ready to inoculate it with mushroom spawn.
Growing Mushrooms on Coco Coir
Growing mushrooms on coco coir is a fun and rewarding hobby that anyone can enjoy. You will need mushroom spawn, a fruiting chamber, and some essential equipment and supplies.
Here are the steps you need to follow to grow your own mushrooms on coco coir.
Step 1: Inoculating the Substrate
The first step is to inoculate the coco coir substrate with mushroom spawn. Mushroom spawn is the living tissue of the mushroom that contains the mycelium.
You can buy mushroom spawn online or from a local supplier or make your own from spores or tissue samples.
You will need a sterile work area, a spray bottle with water, a knife or scissors, and a spawn bag or jar. Follow these instructions:
- Spray your work area with water to reduce the risk of contamination.
- Cut open the spawn bag or jar and break apart the spawn into small pieces.
- Sprinkle the spawn evenly over the surface of the coco coir substrate, making sure to cover all areas.
- Gently mix the spawn and the substrate until they are well combined.
- Seal the container or bag with the inoculated substrate and label it with the date and the mushroom species.
Step 2: Incubating the Substrate
The next step is to incubate the inoculated substrate to allow the mycelium to colonize it. You will need a dark and warm place, such as a closet or a cabinet, and a thermometer. Follow these instructions:
- Place the container or bag with the inoculated substrate in a dark and warm place, away from direct sunlight and drafts.
- Check the place’s temperature regularly and ensure it is within the optimal range for your mushroom species. The ideal temperature for most mushrooms is between 70°F and 80°F.
- Check the mycelium growth for mold, bad smell, or discoloration to see if there is contamination. If you notice any contamination, discard the substrate and start over.
- Wait for the substrate to be fully covered by the mycelium. This can take a few days to a few weeks, depending on the type of mushroom and the conditions. The substrate is ready when a white, fluffy layer of mycelium covers it.
Step 3: Fruiting the Substrate
The final step is to fruit the colonized substrate to induce the formation of mushrooms. You will need a fruiting chamber, a spray bottle with water, and a hygrometer.
A fruiting chamber is a container that provides the right humidity, light, and air exchange for the mushrooms to grow.
You can make your own fruiting chamber from a plastic tub, a perlite layer, and some holes. Follow these instructions:
- Fill the bottom of the fruiting chamber with perlite, a porous material that keeps the humidity. Wet the perlite with water until it is moist but not soggy.
- Transfer the colonized substrate from the container or bag to the fruiting chamber and place it on top of the perlite layer. Depending on your preference, you can cut the substrate into smaller pieces or leave it as a whole.
- Cover the fruiting chamber with a lid that has holes for air exchange. You can also add a filter material like polyfill or Tyvek to cover the holes and prevent contamination.
- Put the fruiting chamber in a bright and cool spot, like a windowsill or shelf. Keep it in indirect sunlight or artificial light for 12 hours each day. The ideal temperature for most mushrooms is between 60°F and 70°F.
- Check the fruiting chamber’s humidity regularly and ensure it is within the optimal range for your mushroom species. The ideal humidity for most mushrooms is between 85% and 95%. You can measure the humidity with a hygrometer, which is a device that shows the moisture level in the air.
- Spray the inside of the fruiting chamber with water twice a day or as needed to keep the substrate and the perlite moist. Do not spray the mushrooms directly, as it may damage them or cause rotting.
- Wait until the mushrooms start forming, which may take a few days to a few weeks, depending on the mushroom species and the conditions. The mushrooms are ready to harvest when they reach their full size, and their caps begin to open.
Tips and Tricks for Success
Growing mushrooms on coco coir is relatively easy but requires some attention and care. Here are some tips and tricks to help you succeed with your mushroom cultivation.
- Choose the right mushroom species for your skill level and preference. Some mushrooms are easier to grow than others, and some have different tastes and textures. Do some research and find out which mushrooms suit your needs and expectations.
- Experiment with different substrates and supplements to find the best combination for your mushrooms. Coco coir is a good base for growing mushrooms. Coco coir is a great option for growing mushrooms. It can be mixed with straw, wood chips, or coffee grounds to create various blends. These blends enhance the nutrients and increase the yield of mushrooms.
- Maintain the ideal temperature, humidity, and light conditions for your mushrooms. Different mushrooms have different environmental requirements, and you need to adjust them accordingly. Use a thermometer, a hygrometer, and a timer to monitor and control the conditions in your fruiting chamber.
- Harvest your mushrooms at the right time and store them properly. Mushrooms are best harvested when they reach their full size and their caps begin to open. Cut them at the base with a sharp knife or scissors, and twist them gently to detach them from the substrate. Store them in a paper bag or a cardboard box in the refrigerator, and consume them within a few days.
Conclusion
Coco coir is great for growing mushrooms. It’s easy to get, cheap, good for the environment, and can be used in many ways. It has many benefits for mushroom growth, such as excellent drainage, aeration, and water retention. Supplements and adjustments can fix the downsides, such as low nutrients and acidic pH.
You can grow mushrooms on coco coir by following the steps and tips in this article. Then, you can enjoy the results.
Growing mushrooms on coco coir is a enjoyable hobby. It provides you with delicious and nutritious food. Additionally, it offers a soothing and immersive experience.
Have you tried growing mushrooms on Coco Coir? What are your results and experiences? Please share with us in the comments section below. We’d love to hear from you.
If you enjoyed this article, please share it with your friends and family who are interested in cultivating mushrooms. Thank you for reading, and happy mushroom growing!